From ages back, here are another round of monster t-shirts for little ones. Hand cut stencils, printed through a screen. Am overdue to make more - oops. Sorry to any one who is waiting. I suck at being a constant producer, I only like making the protptype. I need a santa's workshop of elves to help with the printing. (Tho that would make me santa I guess, and I'm not fond of that two piece outfit)...
Thursday, November 15, 2007
a bit overdue
From ages back, here are another round of monster t-shirts for little ones. Hand cut stencils, printed through a screen. Am overdue to make more - oops. Sorry to any one who is waiting. I suck at being a constant producer, I only like making the protptype. I need a santa's workshop of elves to help with the printing. (Tho that would make me santa I guess, and I'm not fond of that two piece outfit)...
Labels:
printing,
T-shirt makeovers
Monday, October 22, 2007
Saturday, October 20, 2007
Post modern
This was a collaborative art project done in a pub over beer - aint that the best kind - with a persom in mind. When Aunty B upped sticks or downed tools or whatever the phrase is, and moved herself over the seas to live in Europe for a while, we made 'goodbye postcards' at her farewell, and have been sending them, one a week, ever since (like a farewell card in installments). I can only imagine that their fridge is now well and truly bursting with the drunken ramblings of a room full of postcard makers.
Thought others might be interested in the model - could be used for other occasions too - a baby shower (write a tip on the front of each postcard and send a card each week for teh first few months of new mother/fatherhood), new job (post them to the person who's left, things you'll miss about them) or someone sick and off work for a while needing cheering. You can buy packs of blank postcards at art shops, on nice watercolour paper, suitable for painting, drawing and pasting (mmm, pasting) and they already have the square for the stamp etc on the back. Of course you could just take a pack on your next holiday and do them solo, sketches at cafes on the Left Bank, or botanical drawings from restbreaks on your trek sent to desperately envious folks back home too, I think that's what they're designed for.
Labels:
drawing
Monster mash
I found instructions on the interweb for making an ipod monster cover and sent them on to a friend at work who sent them on to her teenage daughter.. who made one! Cool huh? She gave me the OK to post them here. Thanks and well done crafty gal.
Tuesday, September 04, 2007
Talking of handmade...
Poetics of the handmade
This was an exhibition in August this year where Latin American artists “whose practices emphasise the lyrical possibilities of hand-crafted objects. Highlights ondisplay include 'an exquisitely embossed tin and aluminium skateboard by Guatamala’s Dario Escobar and a variety of painstakingly created large scale installations'.
http://www.moca.org/museum/exhibitiondetail.php?id=384
Museum of Contemporary Art, Loa Angeles, USA
This was an exhibition in August this year where Latin American artists “whose practices emphasise the lyrical possibilities of hand-crafted objects. Highlights ondisplay include 'an exquisitely embossed tin and aluminium skateboard by Guatamala’s Dario Escobar and a variety of painstakingly created large scale installations'.
http://www.moca.org/museum/exhibitiondetail.php?id=384
Museum of Contemporary Art, Loa Angeles, USA
Saturday, August 25, 2007
Monster mash
Thanks to Aunty B for this lovely little monster creation all the way from Amsterdam. He was dancing around my desk, so I thought I'd capture it on film. Inspiration maybe for those thinking of making toys.
Labels:
Sewing
Monday, July 09, 2007
Green Space Mural
Last Friday a colleague and I ran a workshop with school children as part of a Green Fair. It was meant to educate the children from several different schools about sustainable buildings, quite a challenge when you only have 20mins per group. We got an artist to help us create a mural. Each student created their own artwork depicting something they could do to make their school or home better for the environment. Some even painted directly onto the canvas, others we took their individual work and pasted it onto the mural and then filled in the gaps in between. We cut out around the pictures to get rid of white space.

As a collaborative art project reinforcing existing knowledge it worked alright. It didn't teach them anything new though unfortunately. And it was impossible to make any links to the role of planning.
But it was nice to get my fingers dirty and do something other than stare at the computer screen.

As a collaborative art project reinforcing existing knowledge it worked alright. It didn't teach them anything new though unfortunately. And it was impossible to make any links to the role of planning.But it was nice to get my fingers dirty and do something other than stare at the computer screen.
Sunday, July 01, 2007
We felt groovy

This is a long overdue post of a felt making workshop that Fitzy K and I attended a few weeks back. It was at Virginia Farms at Annangrove, Sydney, a place where they run spinning, weaving, and felt making workshops throughout the year, and also sell unsprun, carded wool retail, with a small shop front or by mail order.
This particular workshop was on 'nuno felting'. Now last year when Fitz and I did our first feltmaking workshop on molded felt (ie seamless 3d constructions like bags and booties) we heard of the mysterious world of nuno felting, but actually misheard it and thought they were saying 'nano felting' which we assumed was because the processes of the fibre were all so small and not visible to the eye. Aaah. No. It's nuno.
Apparently, although this is hearsay and I stand to be corrected, the process of nuno felting is relatively recent - 'invented' as it were, at an Australian feltmaking convention back in the 90's. It involves attatching animal fibres (sheep wool, llama wool, alpacca, silk) to a finely woven fabric like silk chifffon or cotton gauze, and through the usual process of wetting and agitation of the fibres, allowing the fibres to fasten on to the underlying fabric, to 'felt' on, and therefore attach and make one textile.
It is used a lot for scarves and shawls, where patches of the underlying fabric are left exposed, and are sheer, and the felted area puckers and pulls the fabric around it, making some interesting textures. One of the benefits of this technique is that you have good structural strength supplied by the fabric underneath, and so don't have to apply such a thick layer of felt, you can do quite fine, flexible and subtle felting (yes, there is such a thing!).


This particular workshop introduced the technique of applying orbital sanders to agitate the wool fibres, simulating what you do by hand, but being much quicker. You appply the orbital sander directly to your wetted wool, and you (needless to say?) don't have sandpaper on it. Instead you attach a small swatch of rubber of some kind, like the 'rug gripper' rubber that is textured and soft and you can buy on the roll to go under large rugs. You apply the sander to one patch at a time, holding it still and not pressing down. You need to not use a sander which sucks in air to a bag though, as otherwise it will suck in water - not a good look to mix electricals and water. Otherwise it seems quite safe, the 'motor' bit of most orbital sanders is up in the handle region and the bit that touches the wet wool is inert (of course before trying at home, talk to your hardware puveyor, read the instructions, etc). Oh, and regardless, probably good to use a safety switch at the wall, just in case, we did in the workshop, the teacher was very strict about it.
The orbital sander works like magic, it does the prefelting process in a matter of seconds (as opposed to taking 10's of minutes by hand). At the end you still need to finish the felting processs by hand, by immersing in boiling water and cold water and by wringing it out and agitating teh fibres in all directions etc.
In one day of the 2 day workshop I was able to do quite a large piece, a scarf/shawl which is around 2.8 metres long and 50cm wide. I felted a soft mint/moss green onto same coloured fabric, and put busy scrolls and curlices down to contrast with the plain colours, leaving lots of fabric unfelted to show through. Fitz covered alll of her fabric, using multicoloured wool and putting swirls and lines on top, using the underlying cottton fabric for structural support, allowing for a thin, more even coverage.


The most obvious down side of using the sander for the process was probably the noise. I was still a bit seedy from earlier in the weekend and found that when there was mjore than one sander on in the room the mix of noises, along with people talking was a bit headache-inducing. I had to waer earmuffs and go out for breaks fairly regularly just to get some quiet. Also you can feel it in your hands after a while, and my memory of OHS studies reminds me that people who do a lot of jackhammering or drilling can get 'white finger', I suspect that wont happen in just doing a small piece, but if doing a lot of 'sanding' breaks are probably good for your circulation too.
Oh, and I suppose I also felt a bit like it was cheating, using a power tool to make something by hand, when felting is otherwise such a gently, hands on, tactile experience. I guess it just depends on your particular ratio of desire to engage in process vs need for output vs time available vs excitement at making finished things. And i suppose people use electric sewing machines, electric drills and saws etc alll teh time, so lots of things made by hand are helped by machines. Up to you realy, and definitely worth having both techniques up your sleeve if you want to enter the world of feltmaking :)
[Photos: First photo is Fitz's piece dry, before felting. Great colours huh?
Second photo is dry wool layed down on the fabric ready to be wet and felted.
Third photo is close up of my scarf after felting.
Fourth photo is looking down the felted scarf, still wet. When it dries the colours are much more similar.
Fifth photo is a close up of Fitz's scarf after felting.
Sixth and lucky last photo is looking down same scarf, and you can see a join, where she used a second piece of fabric to extend into a longer piece.]
Saturday, May 19, 2007
Abstract expressionism for infants
Sunday, May 13, 2007
fabric paintings


.. always sound very twee and crap, but I have had fun in recent past with painting with fabric paint and drawing with fabric pens on bits of old sheet and other frabric scraps. It gives a nice texture. Here are some on up my wall. Fabric paint has lots of solvents in it though, so you might want to do it near a nice open window. The tidy lines are done with fabric pens, which come with all sorts of nibs - including wider, calligraphy brush style, and shjort stumpy felt tip style. I have used diluted fabric paint (read - my brush washing water) to give some messy texture to the background and help with shading. Photocopies of pictures on fabric seem to work well too, because the texture gets amplified and it becomes quite grainy.
Monday, May 07, 2007
cheeky little monsters
So the first textile creations to come out as inspired by the stencil art course I did a few weeks ago at PineStreet Creative Arts (Sydney) were a series of monsters singlets and tshirts for bubbas. Some I have already given and others are waiting for special birthdays which are up and coming. I am very inspired to finish the range at least, because there is a wavy armed tree man, few more ghosties, and a spotty dinasaur dragon thing that need to come off the page and be printed at least once, and a few more colour themes to be explored. I enjoyed the aqua / purple / mauve type shades, and doing sets of three with different colours in the same theme. Standard fabric paint and hand made stencils from hand drawn images.
Sunday, April 08, 2007
SummerTime Wallet
I found a free pattern for this little summertime wallet here and thought I would give it a go. The best part was that I got to use up some old fabric scraps that i had lying around from previous projects. I made a few variations...like I didn't sew all the way up the middle seam so the back section could be used for notes and I used ribbon instead of elastic for the button loop. It all seemed to work out fine and Miss Vee was happy to receive it as a birthday present.
Saturday, March 17, 2007
Patchwork Coffee Table

I have been thinking about this for a year when I found some fantastic origami paper at Made in Japan in Melbourne. The paper was already cut into squares making it a lot easier to work with. My other half actually made the table quite a few years ago and when we recently cut the legs off to serve as a coffee table I wanted to jazz up the top so that it didn't need a tablecloth. We stuck the paper on with PVA and then we applied four coats of floor estapol over the top.
Thursday, February 15, 2007
Pictures for Cletus
Shhh don't tell mermaidgrrl but I made her little fella (as yet unborn) some teensy pictures for his wall. They were done on canvas covered board, in acrylics. They are the smal ones, about 15cm by 10cm, and a bit hard to photograph well due to reflections off the shininess of the paint and vthe wacky shadows cast by the kitchen lights. In case it's hard to tell, they are nominally, a giraffe, a ladybird and a crocodile. As follows:
Tuesday, January 30, 2007
Mrs Frugal's t-shirts
Mrs Frugal is part of my attempt to become financially savvy. A strict savings regime has left me with little spare money to spend on my wardrobe. A big hole in my wardrobe was just simple groovy t-shirts.
Rummaging through my suitcases of old clothes that I don’t wear in an attempt to find something I might wear again I found a few things that might serve well as motifs on a t-shirt. The t-shirts I attached them to were all around $10.
The aeroplane came from a hawaiian shirt. I cut it out and overlocked the edges before hemming them so that I had a reasonably straight rectangle to work with. I used a couple of rows of zig zag criss crossing each other to attach it while gently stretching the t shirt fabric as I sewed. It was a bit tricky putting non stretchy onto stretchy, but a few rows of zig zag seem to have sorted it out. I think it is important to stretch but not over stretch the stretchy fabric as you sew.
The black and white spiral thing was from another t-shirt that I really liked, but was just too short for me. As it was stretchy fabric no over-locking or hemming needed of the edges. It just went straight on, again with a few rows of zig zag. It was much easier.
The design on the brown singlet came from a old Miller shirt that I loved. I called them picture shirts, but I don't know their real name. After much time choosing the right bit to cut out I ironed on some interfacing in an attempt to stop it fraying. It has still frayed a bit, but seems to have stopped at just the right point of looking trendy. The interfacing made it a bit stiff, but I think it is better than fraying away to nothing.
Sewing non stretchy onto stretchy was a bit easier in this vertical shape as not much of the motif was going across to stretch. The 2 little buttons were Miss J's idea. They came from the Miller shirt and seem to set it off quite nicely.
For all t-shirts it was very important to have someone pin the motif in place while you have the t-shirt on as body parts can skew and shape things differently.
Saturday, November 11, 2006
Thursday, November 02, 2006
Scarf by Miss J

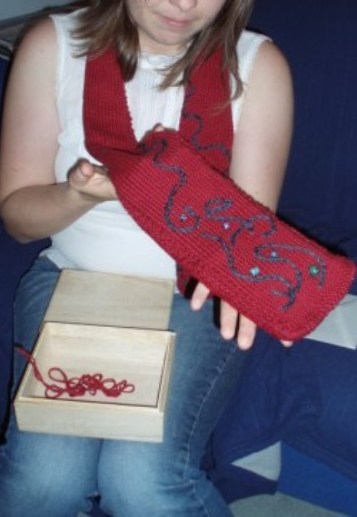
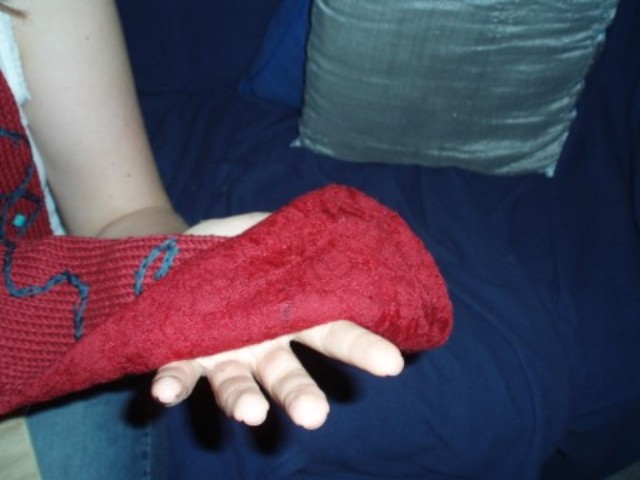
This birthday scarf was a labour of love by Miss J for Merry Risa. Its hand knitted, with beautiful free style beading on the front, and lined with crimson lace on the back. Behold, the tiny stitches and general neatness of the lining!
Friday, August 18, 2006
eating roasted corn
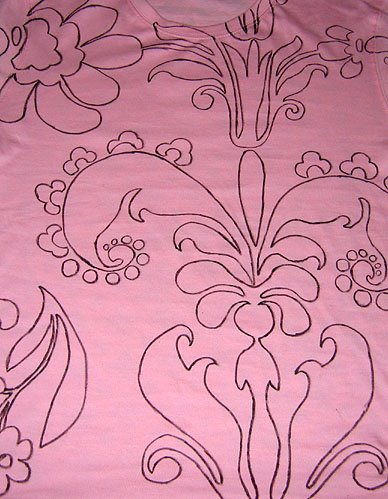
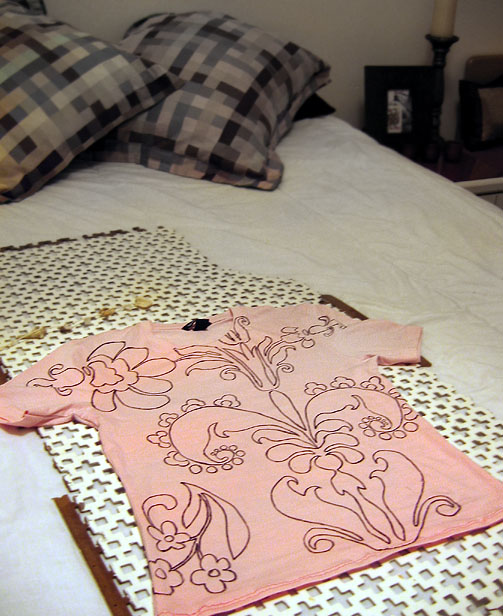
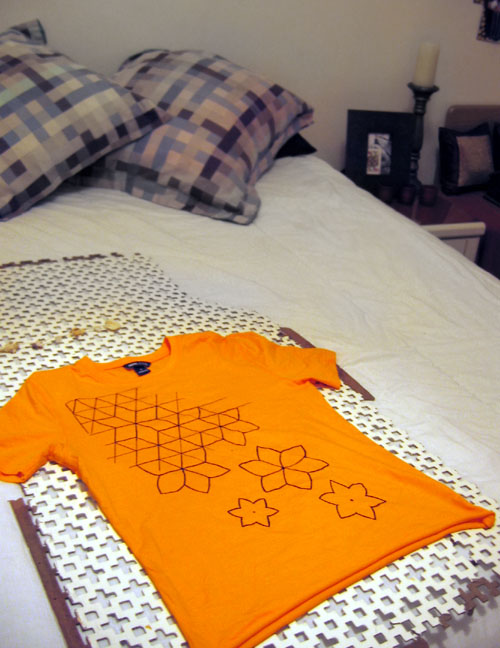
lo lo. here are some I made earlier. T-shirts that is. Before I almost passed out from overexposure to statistics.
here's how to make 3 pound shirts not look 3 pounds:
1. take shirts home to australia to use mum's sewing machine.
2. use said sewing machine to take in the shirts along the sides and sleeves for that snug fitting look. (Tip 1: don't use pen to mark up seams as this will run and stain when the weather gets warm)
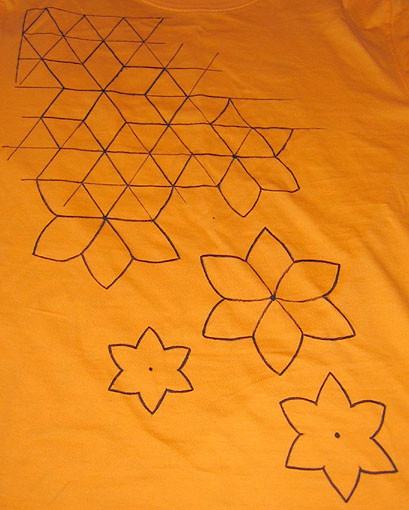
3. doodle some design when you are in transit from sydney to london. I also copied some gift wrap for another design.
4. when arrived in london and over getlag get a fabric marker and draw straight onto the t-shirt, you can use a ruler if you like or just draw free-hand.
5. once ink is dry, wear and look fabulous and thank everyone for the compliments.
M
Thursday, August 17, 2006
Felt making a go go


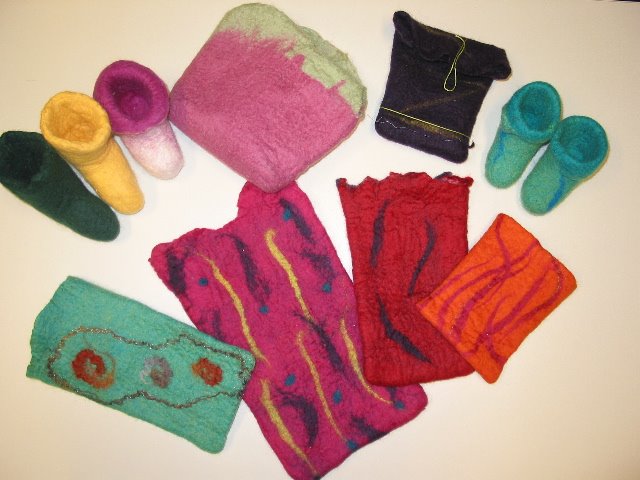
A felt making workshop held at work very excitingly resulted in the following beautiful things... Yah!
See also the work in progress.
Subscribe to:
Posts (Atom)